Today I hit the sale at Michael's while out running errands. I have still been working on the Sindy kitchen scene, but wanted a special roombox for the vintage bunkbeds I had for Skipper. I was lucky enough to find more of the scrapbook paper that matched what I used for the Sindy kitchen, plus they had a sale on foamcore 2 for $3!! Four sheets and I was ready to build my bedroom.
Dimensions for this room matched the cheapo plastic shelves from BJ's I purchased a few years ago for about $20 apiece- I have three. I think the reason for the cheapo price back then is they were in the kids' crayola colors- blue red and yellow, and are made of plastic. Not Ikea, but they do to hold the dolls and room box scenes, and miniature items, plus my boxed dolls as well. The SKipper bedroom and teh Sindy kitchen will reside on these shelves. I'm cleaning out my display space of items I don't use anymore, so please watch my Ebay Auctions . I currently have three lots of American Miniaturist & Miniature Collector magazines with 14 magazines in each lot starting at a low bid of $1.99, plus a set of repainted barbie salon furniture for 3.99. And of course, damaged large scales of Bespaq- but keep watching because I will be listing more magazines and barbies and props as well from my own personal collection. Bids will be started very low as I need to move these items.
Back to the bedroom scene- Dimensions on the room are 28 inches wide, 15 inches deep and 15 inches high. Small, but I think this will pack some punch. One reason I wish to make room scenes on the shelves is to hold all of my extra props and furniture and dolls- I am so tired of my dolls having no place to stand or be displayed comfortably. I will also be working on a room scene for the Jonathan Adler sofa that will be very modern.
Finished room scene box for shelf display
Materials used- Loctite caulk adhesive- available at Home Depot or Lowe's, wood grained shelf paper- also available at Family dollar stores or Lowe's, scissors, xacto knife, rulers, & 3 sheets of foamcore, one 1:12 scale dollhouse miniature window component.
Measure the space where you wish your roombox to be placed, and shave an inch off. I have not placed a ceiling on my roombox as of yet, to make it easier to put the wallpaper on the walls. I use YES! scrapbook paper glue for this- it is available in Michael's or other hobby stores. I put my floor shelf paper on the floor before glueing the walls and floor together.
Cut your foamcore. Remember, measure twice, cut once. It helps to write down your dimensions of the shelf you are creating for. Put a line of loctite caulk adhesive on the bottom edges of the back wall and floor, glue together. Let it sit for a few minutes as it grabs quickly. Next, cut your side wall panels, and do the same as you did for the floor. After these pieces are glued, it helps for steadying and dry time to put a couple of pieces of masking tape on the outside walls to holdit while the loctite dries.
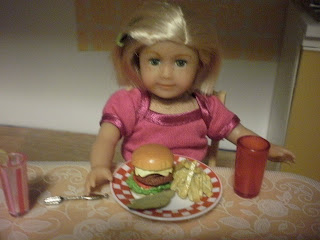
Hopefully, next step will be the paper for the walls!An update on dolly arrivals- Mini American Girl Kit has arrived! Mini Emily is excited and anxious for me to start back to work on Kit's bedroom in the dollhouse. Mini Kit comes to the doll family from one of my friends at American Girl Playthings forum where I hang out. Cheryl, also known as Memory on the board, collects Little Mo's and Hitty dolls as well as the mini american girl dolls. This Kit is special because she repainted her eyes. I look forward to seeing what adventures these two will get into, especially since Mini Rebecca who was won from Ebay will be arriving shortly as well!
All in all, had a great day and hope to get some more work done on both the kitchen and bedroom scenes this week!
~Lisa


No comments:
Post a Comment